I had seen this Ikea mirror hack floating around on Pinterest and I remember it going viral on TikTok at the start of lockdown. Normally I hate doing something that I have seen a million other people do but this one was just tooooo good.
I was looking at these gorgeous frames mirrors and they were so expensive and I am all for a bargain that looks expensive so when I recently made over my dining room and painted the ceiling brown… yep you heard me. Want to see how it looks check it our here:
It obviously made the room a little darker which I knew would happen and I did want as I was trying to achieve a cozy room vibe but we have a huge window that spans the room and I know adding a mirror on the opposite wall would help to bring some of that light back in.
So I set off to IKEA… well actually that’s a lie, I went to the spa with my friend on a Sunday away from the kids and we snuck off early to go mooch around IKEA kid-free for an hour! It was bliss!
I purchased two packs of LOTS mirrors for this Ikea mirror hack (although I should have purchased 3, at the time I had planned to do a different shape to the one I ended up doing) initially I was going to go for a rectangle with four mirrors stacked by two.
Once I started I realised I wanted to do a square as the dresser I had underneath was a rectangle and it all looked a bit too samey
The total cost for me was £25 as I already owned the black paint. If you don’t have any a sample pot would be more than enough for this project.
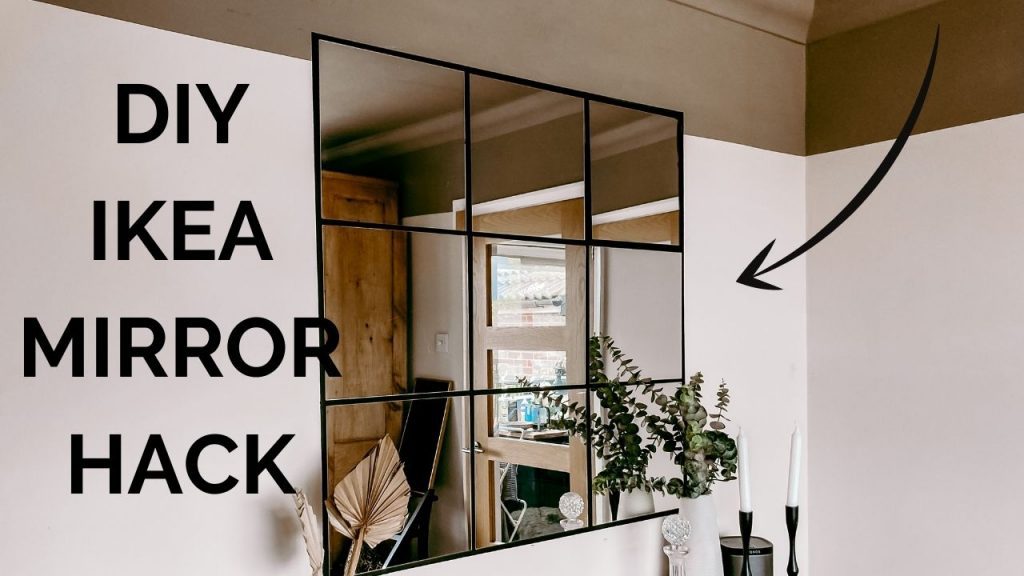
I went for a square mirror 3×3 shape with a 1cm gap between each mirror.
So I measured the mirrors they were 30cm x 30cm and so I marker onto the wall a box 94cm x 94cm this gave me a 1cm gap between each mirror and on the outside edge. I
Once I had made my marks I used masking tape to outline everything, I used my level to double check everything was perfectly straight.
And then sealed the tape using caulk so that the black paint I would add in a moment wouldn’t seep under the tape and I would get nice crisp lines.
To read more about this process as it is a super hack click HERE
Once the masking take was sealed I painted a black grid onto the wall – I didn’t see any point in painting the whole square black as the mirrors would cover most of it and it would be a waste of paint.

I used loof by Frenchic for this hack. I applied two coats to make sure there were no streaky lines.
Once the paint had dried I double-checked the measurements for 1cm and used the double sided sticky tape that came with the mirrors to attached the mirrors to the wall. Pressed and held them in place for about 30 seconds to make sure they properly stuck and stood back and admired my new mirror!!